
Japan Airport Arrivals Guide: Baggage Etiquette & Transit
Navigate Narita and Haneda airports efficiently. Learn strict baggage claim etiquette, luggage forwarding costs, and the best transit options for heavy bags.
Navigating a new airport with multiple heavy suitcases is stressful, especially after a 12-hour flight. In Japan, however, your cultural education begins the moment you step up to the luggage carousel. You are about to experience legendary Japanese orderliness—a system so polite and efficient it might just be the most relaxing part of your transit. In this guide, you will learn exactly how to handle baggage claim etiquette, utilize luggage forwarding services, and select the right transit to central Tokyo. I will walk you through the precise costs, transit times, and step-by-step logistics to get you from the carousel to your hotel seamlessly.
Quick Facts: Tokyo Airport Arrivals
- Best Time to Land: 10:00 AM - 2:30 PM (avoids peak commuter rush hours on trains)
- Average Baggage Wait Time: 15-25 minutes post-immigration
- Luggage Delivery Cost: $13-$25 USD (2,000-3,500 JPY) per suitcase
- Distance to Central Tokyo: Narita (NRT) is 60 km / 37 miles; Haneda (HND) is 15 km / 9 miles
- Duration Needed for Arrival Process: 45-90 minutes from landing to boarding transit
The Golden Rules of Baggage Claim Etiquette
If you are used to travelers aggressively elbowing their way to the front of the luggage belt, prepare for a welcome culture shock. The Japanese approach to the baggage carousel is an exercise in communal respect and extreme spatial awareness.
Here is exactly how to behave at the carousel to blend in perfectly:
- Find the 1-Meter Boundary: Look for the painted line on the floor (usually yellow or white) located exactly 1 meter (3 feet) back from the moving conveyor belt.
- Hold Your Position: Stand strictly behind this line. Do not lean your knees against the metal edge of the carousel or block the line of sight for travelers standing behind you.
- Execute the Step-and-Retreat: When you spot your suitcase approaching, step forward across the line, pull your bag off the belt, and immediately take two steps back into the main walking area.
- Manage Your Trolley: Keep your luggage cart parked parallel to the belt, well behind the 1-meter line. Never wedge it into the gap where people are actively retrieving bags.
Pro Tip: Keep your baggage claim tags in your left pocket or easily accessible. While Japanese customs rarely check tags against bags upon exit anymore, having them ready saves 2-3 minutes if an attendant needs to verify a black suitcase that looks exactly like fifty others on the belt.
What to Do When You Have Too Much Luggage
Many travelers realize upon landing that navigating Tokyo's complex train stations with three massive 28-inch suitcases is a logistical nightmare. Tokyo stations involve endless walking, crowded platforms, and sometimes a lack of convenient elevators.
Enter Takkyubin (Luggage Forwarding Services). Companies like Yamato Transport (identifiable by a yellow oval logo with a black cat) and JAL ABC operate counters immediately outside the customs exit doors.
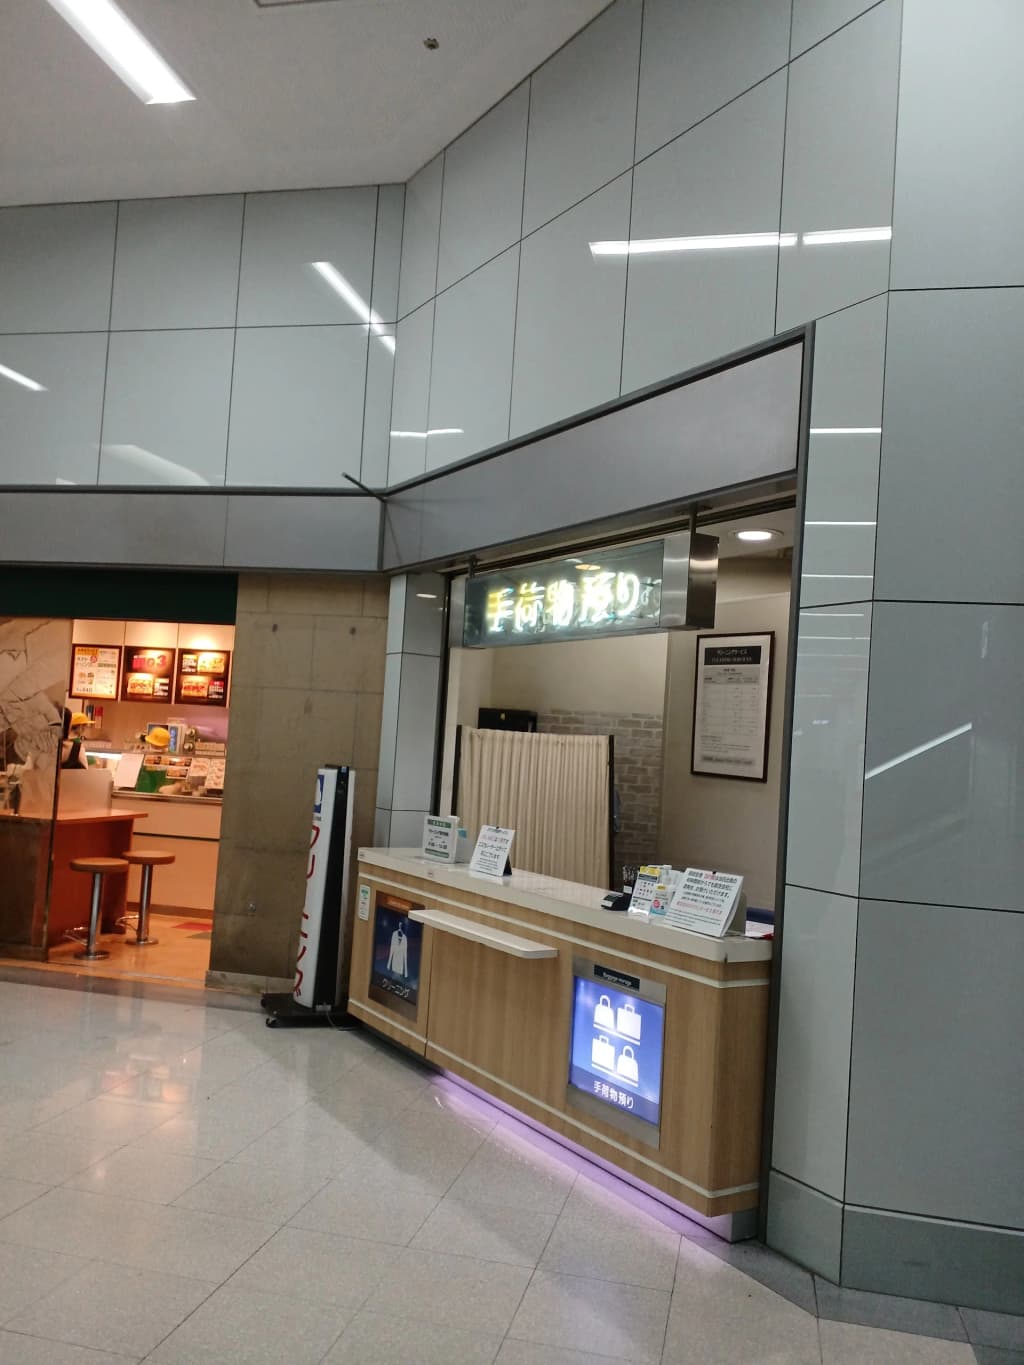
How to execute the luggage forwarding process:
- Locate the Counter: Turn left or right immediately after exiting the customs sliding doors. Look for the Yamato Transport or JAL ABC signs in the Arrivals hall.
- Prepare Your Address: Have your hotel's exact address, postal code, and phone number printed out or screenshotted. The attendant will copy this onto a physical waybill.
- Measure and Pay: The attendant will measure your bag's total dimensions (Length + Width + Height). A standard checked bag usually totals around 150 cm and costs roughly 2,500 JPY ($16 USD).
- Secure Your Receipt: Take the pink or blue carbon-copy receipt. Your bag will magically appear at your hotel's front desk, usually by 12:00 PM the next day.
⚠️ Watch Out: Same-day delivery from Narita or Haneda to a central Tokyo hotel is only possible if you drop off your bags before 10:30 AM. Otherwise, pack a small 20-liter daypack with your toiletries and next-day clothes.
Comparing Luggage-Friendly Transit Options
If you decide not to forward your luggage, you need to choose your transit method carefully. Not all Tokyo transport is created equal when you are hauling 50 lbs of gear.
Transit Option Est. Cost (USD) Time to Tokyo Luggage Friendliness Best For Airport Limousine Bus $22 75-90 min Excellent (Stored underneath) Heavy packers heading directly to major hotels Narita Express (NEX) $20 53-60 min Good (Designated racks with locks) Travelers staying near major JR hubs (Shinjuku/Tokyo) Keisei Skyliner $17 41 min Moderate (Limited rack space) Speed-focused travelers with 1 medium bag Local Commuter Train $8 90+ min Terrible (Must hold bags upright) Extreme budget travelers with a 40L backpack Fixed-Fare Taxi $150+ 60-80 min Excellent (Trunk space for 2-3 bags) Families of 3-4 splitting costs
Common Mistakes to Avoid
Even seasoned travelers make logistical errors when arriving in Japan. Keep your trip running smoothly by avoiding these specific pitfalls:
- Attempting Rush Hour with 28-inch Bags: Never drag large suitcases onto local Tokyo trains between 7:30 AM - 9:00 AM or 5:00 PM - 7:00 PM. The trains operate at 150% capacity, and you physically will not fit through the sliding doors.
- Blocking Escalator Flow: In Tokyo, stand strictly on the left side of escalators and walk on the right (note: this rule flips if you travel to Osaka). Never place your suitcase beside you; keep it directly in front of or behind you to maintain a 50cm passing lane.
- Losing the Waybill: If you use a forwarding service, treat the carbon-copy receipt like your passport. You need the 12-digit tracking number if the hotel front desk misplaces your delivery.
- Ignoring Coin Lockers: If you arrive at 8:00 AM but check-in is not until 3:00 PM, do not drag your bags around the city. Use station coin lockers (costing 500-800 JPY / $3-$5 USD) to store them for up to 24 hours.
Your Arrival Action Plan
To optimize your first 60 minutes in Japan, follow this exact sequence after stepping off the plane:
- Clear Customs (Minute 0-15): Hand over your blue paper declaration form or scan your Visit Japan Web QR code at the electronic kiosks.
- Assess and Forward Luggage (Minute 15-30): Drop any bag larger than 24 inches at the Yamato Transport counter. Keep only what you can comfortably carry up a flight of stairs.
- Acquire Cash (Minute 30-40): Walk to the 7-Bank ATMs in the arrivals hall. Withdraw 10,000 to 20,000 JPY ($65-$130 USD) to ensure you have cash for small vendors and IC card reloads.
- Purchase Transit Cards (Minute 40-50): Buy a Welcome Suica or Pasmo Passport IC card at the automated station machines. Load it with 3,000 JPY ($20 USD) to start.
- Board Transport (Minute 50-60): Follow the English signage to the Limousine Bus stands or train platforms, completely unburdened by heavy luggage.
By respecting the carousel etiquette and strategically managing your bags, you will start your Japanese adventure with the same serene efficiency that makes the country so incredible to navigate.
More Photos

More Adventures
 $80 - $200/day 3-5 days
 At the Edge of the Map: Tasting Ushuaia's Deep Sea Secrets
Discover the unexpected culinary treasures of Ushuaia, Argentina. Taste deep-sea Patagonian toothfish, historic scallop soup, and artisanal chocolates.
 $60 - $150/day 5-7 days
 Conquering Florianópolis: A 6-Day Wild Island Escape
Skip the tourist traps in Florianópolis. Discover secret islands, massive sand dunes, and boat-access-only lagoons in this high-octane 6-day Brazil itinerary.
 $150 - $300/day 1-2 days
 Skip the Rides: Hacking Disney's Parallel Reality
Skip the rides and step into the illusion. How to explore Disney's Hollywood Studios as a massive, mind-bending parallel reality.
 $300 - $600/day 1-2 days
 A 30-Hour Dallas Layover: Finding Luxury in Flight Delays
An unexpected 30-hour flight delay transforms into a sensory journey through American Airlines Flagship Lounges and the quiet morning streets of downtown Dallas.